SCHEDULE A SQL QUERY IN 3 STEPS
Let's Get Started
The ODBC standard exists for a long time and is supported by almost all databases. AutoSQL uses ODBC drivers to execute queries on any database. From the AutoSQL GUI you can specify a connection string directly, or build one from any of the installed driver wizards. If you already have a DSN created from the ODBC Data Source manager, you can also extract the connection string from that.
Step 1: Setup a connection to your database
Before you start you need to download AutoSQL. If you click the button below you will download the 64 bit version
The easiest way to get a connection string is to build it from the relevant driver wizard. The installed drivers are listed like below:

If the driver you need is not listed, first install it on the computer or server you run AutoSQL. A list of ODBC driver downloads can be found below for the most common databases (SQL Server, MySQL, Oracle, PostgreSQL , DB2): ODBC Drivers.
When you click the ‘Build connection string’ button, it will come up with the driver wizard to setup a connection to your database. The example below will continue with SQL server as an example.
In this example we will work with Microsoft SQL server. This is driver is typically already installed on any Windows installation.

1. Select the SQL server you want to connect to. The drop down menu doesn't always work, in that case you should manually put in the hostname of the database

2. Select the way you want to authorize on the SQL server. Either to integrated Windows, or a specific database user

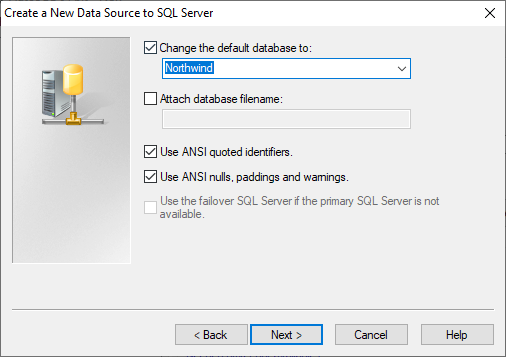
3. Choose the default database, and click ‘Next’

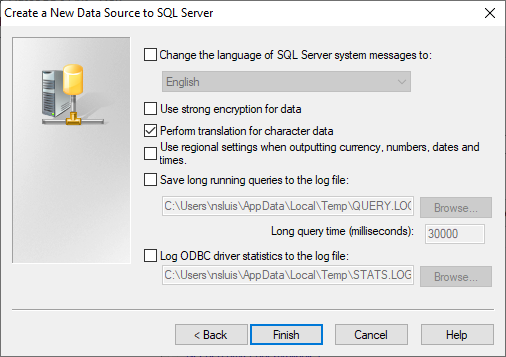
4. Leave all of this to the default values and click ‘Finish’
When you click finish, and the connection was succesful, the resulting connection string is inserted into AutoSQL:

The password is not always copied, so don’t forget to re-enter that. Hit ‘Test connection’ to get a final confirmation that it’s working.
Step 2: Setup an AutoSQL action list
When the connection is establed, you can continue to the ‘Query’ tab and enter the SQL query that you want to automate or schedule.
Click ‘Test query’ to see if both the connection and the query itself work as expected.

Define your output options and click ‘Run Action’ to test it.

Before you can send emails through AutoSQL, you need to complete the settings in the email tab. This is optional, when you don’t want to send an email, you can untick ‘Send email’.

Step 3: Scheduling the action list to run at any time
After you have saved your action list, you can schedule it. This can be done by clicking the ‘Schedule’ button. It wil help you to create scheduled tasks in Windows Task Scheduler.

Now you will get a new dialog where you can edit or delete existing scheduled tasks for the current action list. You can also create a new one by clicking ‘Add new’.

Use the options to create a new trigger for starting the background job. In the example below the task will run every monday at 02:00 AM.

After defining the schedule, you will get a final screen for specifying the details of the scheduled job. By default it will get the same name as the AutoSQL job file appending with the current time. In this screen you can also change the security settings. This is important as it determines if the job can be ran on the background and which credentials are used.

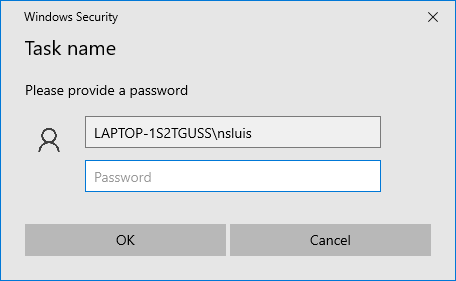
If you choose the job to ‘Run wether user is logged on or not’ it will finaly prompt you for the password. This is standard for Windows Task Scheduler.

That’s it! Now you have setup the complete chain to run a query every Monday morning and send the results by mail.
